Posts

Showing posts with the label diy

55 Globe Bowls... tick... tick... tick...

Image
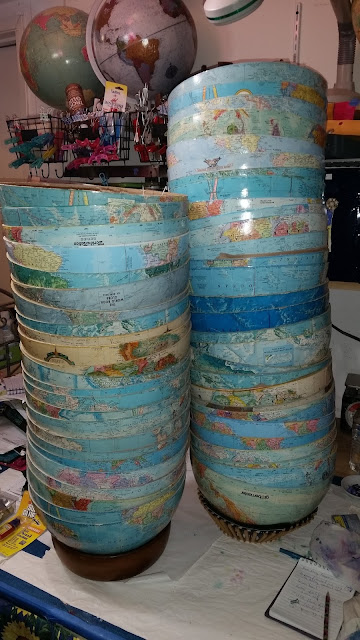
Most of my cut globes The bases with holes drilled in them 9/11/15 update - have gotten all the gluing done (whew!).  Now on to the sanding of the insides and edges. And on a different note, The victims and heroes of 9/11 are in my thoughts and prayers today! Tick... tick... tick... the sound of the clock.  There is NOTHING like a deadline to make you aware of time!  Specifically, how LITTLE time you have to get your project done! I've created a checklist for myself so I know what I need to do and when I need to have it all done.  I thought perhaps that would help me feel more organized - and it does... but it also feels like I've put a bunch more pressure on myself rather than alleviating it. __x_ Do I have enough globes? YES.   (Whew!)   __x_ Do I have enough bases? yup.   ____Do I have enough hardware .. thought I did. NOPE .  Gotta go get slightly longer screws.... sigh. I thought I had the right size, but di...

So you're thinking of making your own World Globe Lampshade or Pendant Lamp?

Image
So you're thinking of making your own World Globe Lampshade or Pendant Lamp?   World Globe Lampshade with Beaded Trim My previous post talks about finding, selecting, and cleaning a World Globe.  THIS post will give you a basic tutorial of how to make your own lampshade or lamp out of your globe along with a few tips about using World Globes as lampshades or pendant lamps. To make a lampshade (or a pendant lamp) you'll first need to decide what size lampshade you want.  Do you want to open the globe at the equator giving you a half-lamp look?  Or do you want to cut along a latitude line below the equator to give you a taller lampshade?  Both look nice and it's just a matter of personal taste (although if your globe is falling apart at the equator, then it's quite easy to make it a half-globe lampshade!).  By the way, you don't have to do anything fancy - of course you can just slice open the globe and stick it on a lamp.  It just won't look...

So You Want To Make Your Own Vertical Stovepipe Steamer?

Image
I wrote a post on my other blog several years ago, but was just asked to create a new document for the Silk Painters group on Facebook.  So I thought I'd share it here! Making your own Stovepipe Steamer is relatively easy to do and certainly cost effective!  To buy one new (and made specifically for silk paintings) will easily cost you over $1000 bucks.... but making one yourself can cost under $100 (mine was less than $50!). I've had several people ask: Why do you want a Stovepipe Steamer?  Can't you just use a pot and steaming basket on your stove? Both are good questions! Yes you can use a pot and steaming basket on your stove.  But I personally, don't care for the idea of the chemicals/dyes/etc being in my kitchen. They are NOT good eats (to borrow from Alton Brown). Plus if you use a steaming basket in a pot, you have to constantly watch the water levels.  And you don't have a lot of space, which means you're probably only steaming 1 item at a time....